Close Menu
  • Support Us
  • Login
  • Newsletter
  • News
  • Features
  • Interviews
  • Reviews
    • Video Games
      • Previews
      • PC
      • PS5
      • Xbox Series X/S
      • Nintendo Switch
      • Xbox One
      • PS4
      • Tabletop
    • Film
    • TV
    • Anime
    • Comics
      • BOOM! Studios
      • Dark Horse Comics
      • DC Comics
      • IDW Publishing
      • Image Comics
      • Indie Comics
      • Marvel Comics
      • Oni-Lion Forge
      • Valiant Comics
      • Vault Comics
  • Podcast
  • More
    • Event Coverage
    • BWT Recommends
    • RSS Feeds
Facebook X (Twitter) Bluesky Instagram RSS
Support Us
But Why Tho?
RSS Facebook X (Twitter) Bluesky YouTube Instagram
Trending:
  • Features
    Modern Warfare 4 DMZ screenshot

    Tales from the DMZ: Call of Duty: Modern Warfare 4 — Let’s make a mess!

    10/29/2026
    Black Lagoon Revy in Action

    ‘Black Lagoon’ Remains A Singular Piece Of Art 20 Years Later

    10/28/2026
    World of Warcraft Midnight Curse of Ula Tek

    ‘World Of Warcraft Midnight’ Is In Trouble And Patch 12.1.5 Made It Worse

    10/27/2026
    Mordin Solis in Mass Effect 3 from Bioware

    BioWare’s Art Helped Me Understand Who I Am — Now, They’re Gone

    10/21/2026
    Friday the 13th Films Ranked BUT WHY THO

    Ranking Every Friday The 13th Film, From Indie Origins To Blockbuster Franchise

    10/19/2026
  • Netflix
  • blizzcon
  • Game Previews
  • Sports
  • TCG
  • tiff
But Why Tho?
Home » BOOM! Studios » REVIEW: ‘Jim Henson’s: Beneath The Dark Crystal,’ Issue #9

REVIEW: ‘Jim Henson’s: Beneath The Dark Crystal,’ Issue #9

Aaron PhillipsBy Aaron Phillips05/03/20193 Mins ReadUpdated:08/09/2021
Share Bluesky Facebook Twitter Reddit Copy Link
Follow Us
Add as Preferred on Google Flipboard Bluesky
Jim Hensons Beneath The Dark Crystal 9 But Why Tho
Share
Bluesky Twitter Facebook Copy Link Reddit Pinterest

Beneath the Dark Crystal #9

Jim Henson’s: Beneath The Dark Crystal #9 is published by BOOM! Studios‘ imprint Archaia, written by Adam Smith, illustrated by Alexandria Huntington, and lettered by Jim Campbell. When last we were in the lands of Thra and Mithra, in issue eight, our heroes had hit some of their lowest points yet for the series. Kensho’s band of misfits had finally discovered his true identity. Kensho is the lightborn, of the Crystal Castle, and the leader of the Gelflings. For all of his efforts in trying to rebuild his race, return the offerings back to his people, and restore the land, he had lied to those closest to him and that lie had struck them deeply.

Get BWT in your inbox!

Subscribe to our weekly newsletter and get the latest and greated in entertainment coverage.
Click Here

Get BWT in your inbox!

Subscribe to our weekly newsletter and get the latest and greated in entertainment coverage.
Click Here

Meanwhile in the depths of the Firelands lies the subterranean Kingdom of Mithra where Thurma and Nita had uncovered an awful truth of their own. The fire that stays had been manipulating the Ember Queens for his own personal gain and he seeks to extinguish all of the firelings and from the ashes rebuild a new era. Now, both of our heroes seek solace in the fire, as they search for answers and direction. Just as they are feeling completely alone, an unknown force brings them together.

A lot of time has passed since Kensho and Thurma have been together, but they are finally reunited in Jim Henson’s: Beneath The Dark Crystal #9. The two have not crossed paths since the climatic ending of The Power of the Dark Crystal. Neither of them understand where they are, nor do they care, as long as the can share the space with each other. Last we saw Kensho he was physically in the home of the Mystics in Thra and Thurma was on a quest to become Ember Queen and relight the fire for her people. Yet, here the two stand embracing each other as projections in some sort of astral plane.

The entire issue unifies to the two major plots of Beneath the Dark Crystal. It is also here where the story that Smith presents really has to stand tall, because there’s nowhere else to hide, which it does pretty successfully. The tone resonated for me personally, showing the two protagonists in vulnerable states with a person they trust and opening up. The issue is successful in highlighting our two leaders’ battles with self-doubt, insecurities, and the post-traumatic stress wrought by the Skeksis. Just as the two are at their lowest, they find the words and the strength for their significant other. This for me echoed the same themes from The Dark Crystal movie that captured my imagination and heart as a child.

The artwork by Huntington in this issue really lifts up the story also. Each panel is surrounded by a fluid lighter board, every one different from the last. The illustrations really driving home the impact of the two sharing space in this ethereal plane. There is a real change in the story here as both Kensho and Thurma reach a state of clarity. The issue ends, and I didn’t want it to stop.

Jim Henson’s: Beneath The Dark Crystal #9 is available in shops now.

Jim Henson's: Beneath The Dark Crystal Issue #9
4

TL;DR

The issue #9 unifies two major plots of Beneath the Dark Crystal. It is also here where the story that Smith presents really has to stand tall, because there’s nowhere else to hide, which it does pretty successfully. The issue ends, and I didn’t want it to stop.

  • Buy via ComiXology Affiliate Link

Share. Bluesky Facebook Twitter Copy Link Pinterest LinkedIn WhatsApp Reddit
Previous ArticleREVIEW: ‘Xenon Racer’ (PS4)
Next Article BETA REVIEW: ‘Warhammer Chaosbane’ Uses its Fantasy Lore to the Fullest (Xbox One)
Aaron Phillips
  • X (Twitter)
  • Instagram

Aaron is a contributing writer at But Why Tho, serving as a reviewer for TV and Film. Hailing originally from England, and after some lengthy questing, he's currently set up shop in Pennsylvania. He spends his days reading comics, podcasting, and being attacked by his small offspring.

Related Posts

Ghostlore #1

REVIEW: ‘Ghostlore,’ Issue #1

05/10/2023
MMPRTMNT II #1 - But Why Tho

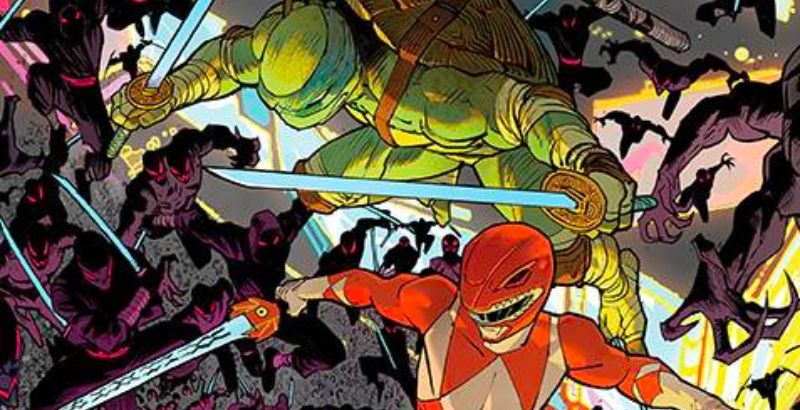
REVIEW: ‘Mighty Morphin Power Rangers/Teenage Mutant Ninja Turtles II,’ Issue #1

12/28/2022
Nahiri The Lithomancer #1

REVIEW: ‘Nahiri The Lithomancer,’ Issue #1

11/30/2022
Once upon a Time #1

REVIEW: ‘Once Upon A Time At The End Of The World,’ Issue #1

11/23/2022
Mighty Morphin' Power Rangers #101

REVIEW: ‘Mighty Morphin’ Power Rangers,’ Issue #101

10/26/2022
Eve: Children of the Moon #1

REVIEW: ‘Eve: Children of the Moon,’ Issue #1

10/18/2022

Get BWT in your inbox!

Subscribe to our weekly newsletter and get the latest and greated in entertainment coverage.
Click Here
TRENDING POSTS
Téa Leoni and Tim Daly in Newlyweds Episode 1
7.5
TV

REVIEW: ‘Newlyweds’ Episode 1 — “Pilot”

By Mike BC10/25/2026

Newlyweds Episode 1 is a mostly successful execution of the cozy situational comedy so dear to television audiences, driven by actors with great chemistry.

James Remar and Michael C. Hall in Dexter: Resurrection Season 2 Episodes 1-2
6.5
TV

REVIEW: ‘Dexter: Resurrection’ Season 2 Episodes 1-2 Are A Messy, Entertaining Start

By James Preston Poole10/28/2026Updated:10/29/2026

Dexter: Resurrection Season 2 Episodes 1-2 continues on the promise of Season 1, albeit with some kinks to work out.

Dragon Ball Super: Beerus Episode 3 Beerus
8.5
Anime

REVIEW: ‘Dragon Ball Super: Beerus’ Episode 3 — “The God Of Destruction Heads To Earth”

By Charles Hartford10/25/2026Updated:10/26/2026

Dragon Ball Super: Beerus Episode 3 sees Beerus clash with Earth’s strongest fighters when he disrupts Bulma’s burthday party.

VisionQuest Episodes 5-6
5.0
TV

REVIEW: ‘VisionQuest’ Episodes 5-6

By Allyson Johnson10/28/2026Updated:10/28/2026

VisionQuest Episodes 5-6 might have a lot going on from Ultron’s romance to Paladin’s return, but none of the storylines are compelling.

But Why Tho?
RSS X (Twitter) Bluesky YouTube Facebook Instagram Pinterest Twitch
  • CONTACT US
  • ABOUT US
  • PRIVACY POLICY
  • SUBSCRIBE TO OUR NEWSLETTER
  • Review Score Guide
Sometimes we include links to online retail stores. If you click on one and make a purchase we may receive a small contribution.
Written Content is Copyright © 2026 But Why Tho? A Geek Community

Type above and press Enter to search. Press Esc to cancel.

But Why Tho Logo

Support Us!

We're able to keep making content thanks to readers like YOU!
Support independent media today with
Click Here